- Login to Drupal as Admin: Navigate to your Drupal website and log in using your administrator credentials.
- Access the Content Section: Once logged in, locate the top menu and click on “Content” to access the content management section:
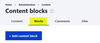
- Navigate to Blocks: In the content management section, click on “Blocks.” This will take you to the Blocks administration page:
- Add a Content Block: On the Blocks administration page, locate the “+ Add Content Block” button and click on it to add a new block:
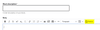
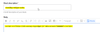
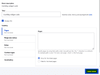
- Select Text Format: Below the content editor, you’ll find a drop-down menu labeled “Text Format.” Select “Full HTML” from the drop-down menu to ensure proper rendering of HTML code:
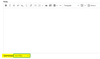
- Edit the Block Content: In the editor, click on the “Source” button, usually located among the formatting options. This will allow you to input raw HTML code directly:
- Insert UserWay Code and Title: Copy the UserWay (UW) code provided for your block and paste it into the editor. Ensure that the code is pasted correctly to avoid any syntax errors, and add the Block Description (Title):
- Save the Block: Once you’ve inserted the UserWay code, click on the “Save” button to save the block with your custom content:


Adding the Block to the Header Section:
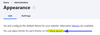
- Navigate to Appearance Settings: Return to the Drupal admin dashboard and click on “Appearance” in the top menu:
- Access Block Layout: In the Appearance settings, look for the option that allows you to manage block layout. You can also access this directly by visiting
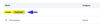
example.com/admin/structure/block: - Place the Block: On the Block Layout page, locate the section corresponding to the header of your theme. This may be labeled as “Header” or similar:
- Add the Custom Block: Within the header section, click on “Place Block” to add a new block to this region:
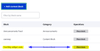
- Select the Created Block: From the list of available blocks, locate the custom block you created earlier. Select it and then click on “Place Block” to add it to the header section:
- Save Changes: After adding the block to the header, remember to save your changes to ensure that the custom block appears correctly on your website’s header:


If you require additional assistance, feel free to contact us at desk@support.userway.org.