
Note: This feature requires the Live Site Translation add-on to be enabled.
To enable the Live Site Translation button on your UserWay dashboard, follow these steps:
- Login to the Dashboard: Visit UserWay Dashboard and log in with your credentials.
- Access My Sites and Select Your Domain: On the left-side menu, locate and click on My Sites. From the list of sites, click on the domain name for which you wish to enable the Live Site Translation button.
- Navigate to the Customize Tab: Once you’ve selected the domain, navigate to the widget settings. Click on the Customize tab to access customization options.
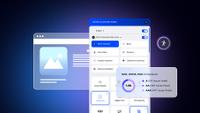
- Locate the “Live Site Translation Buttons” Section: Scroll down the window to find the Live Site Translation Buttons section.
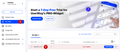
- Enable Live Translations and Customize the Button: Within the Live Site Translation Buttons section, locate and click on the Enable Live Translations button. Customize the Live Site Translation button according to your preferences, adjusting its appearance or behavior as needed.
- Apply Changes: After customizing the button, click on Apply to save your changes.


Additional Options:
- Use Translations Button as Default Button: This option displays only the translation icon with the selected button style, while all the widget functions remain available and visible.
- Position Translation Button Above: Choose this option to add the translation button above the default widget button. When end users click on the translation button, it will display the drop-down menu for selecting languages.
If you require additional assistance, feel free to contact us at desk@support.userway.org.